The Qtouch Composer is available for few select set of devices. But users can use Qtouch Studio 4.4 for devices which are not supported in Qtouch Composer. Also YA,YB shared on same port feature is available in Qtouch Composer and not available in Qtouch Studio 4.4.
The following steps describe the details on how to use pin configurability for QMatix Acquisition method:
- 1.
Open AVR Qtouch Studio .Enable the Design Mode Radio button on the left hand side of the screen
Figure 1. Selecting the Design mode in the AVR QTouch Studio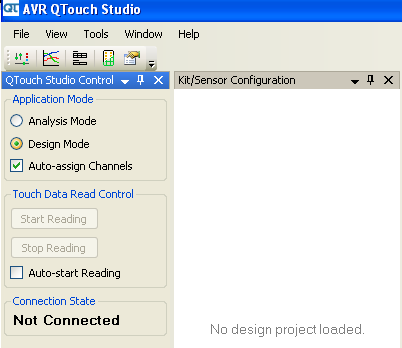
- 2.
Go to File Menu option and click New Design .
Figure 2. Selecting New Design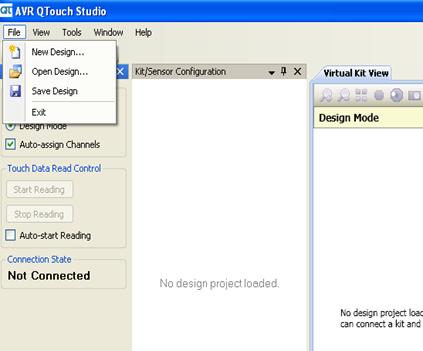
- 3.
In the Create New Design Window, give the Project name and Kit Technology (QMatrix in this case) and Number of sensors (Keys/Rotors/Sliders) and click Create Design.
Figure 3. Creating a new design in the AVR QTouch Studio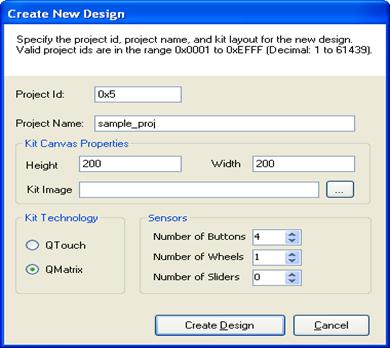
After Creating Design, the new design mode shows the virtual kit view with sensors that have been created in some order.
Figure 4. New Design Sensors in the AVR QTouch Studio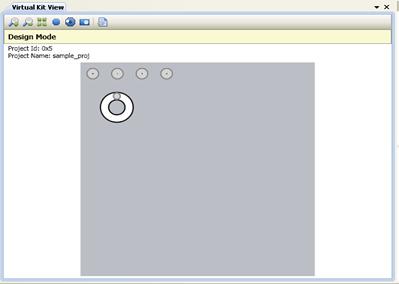
- 4.
Now Go to Tools->Pin Configuration Wizard as shown below .
Figure 5. Selecting the pin configuration wizard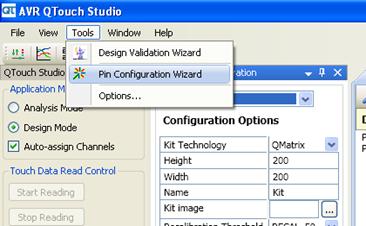
- 5.
Pin configuration Window will pop up with the information on the usage of the tool. Click Next to proceed.
Figure 6. Start window of the configuration wizard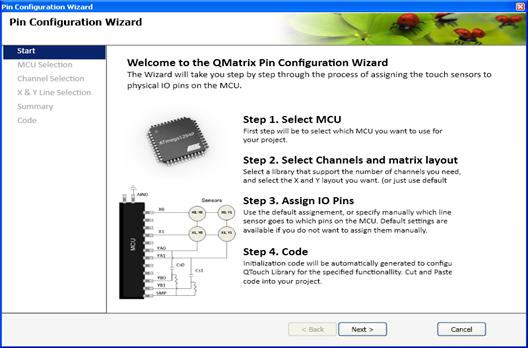
- 6.
Select the MCU and click Next as shown below .
Figure 7. MCU selection window from the configuration wizard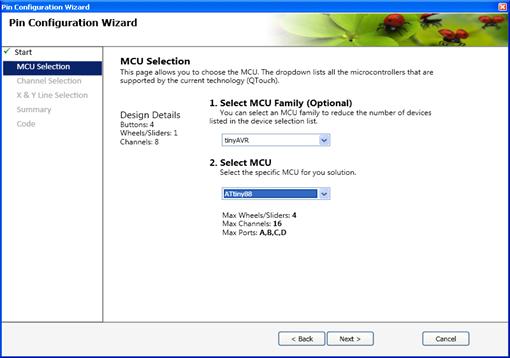
- 7.
Select the Channels needed for the design from the list provided and click Next.
If 6 channels are needed, the next immediate value that suits the design needs to be selected. I.e. 8 channels (4 x 2 ) configuration .
Figure 8. Selecting channels and configuration in the New Design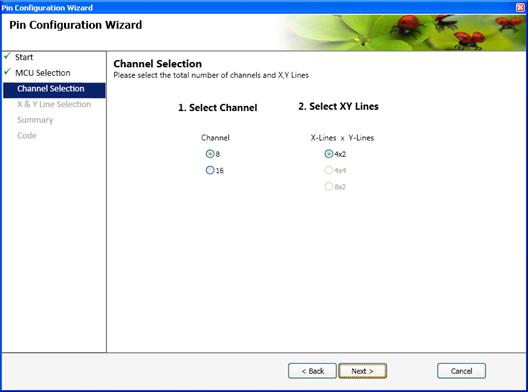
- 8.
Select the pins used for the design and click Next .
If there is error in the selection of the pins (Ex: conflictin pins used), a red marker will be appear and the user cannot proceed to next step in configuration until the user has done the correct pin selection .
Now once the selection is done without errors, Click Next .
Figure 9. Selecting the X,YA,YB,SMP Pins in the new Design with errors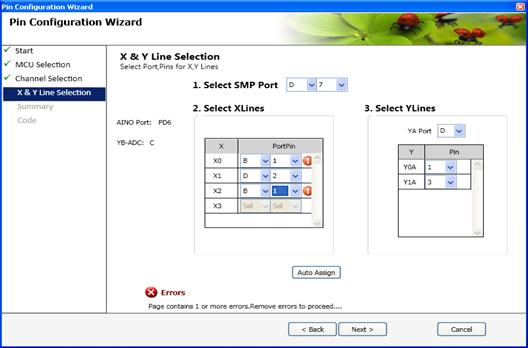
Figure 10. Selecting the X,YA,YB,SMP Pins in the new Design without errors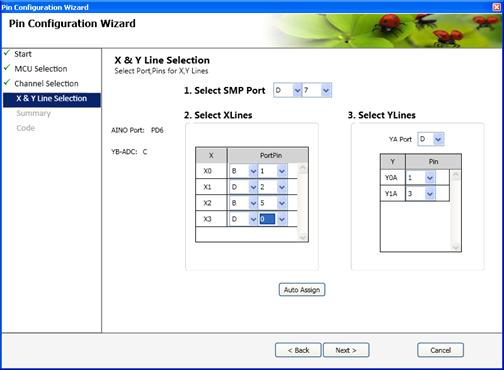
Once the pins are selected, Pin Wizard will provide the summary report .Check whether details are correct as specified.Click Next .
If there are some errors that are found in the summary report, the user can click “back” button and modify the changes needed .
Figure 11. Summary report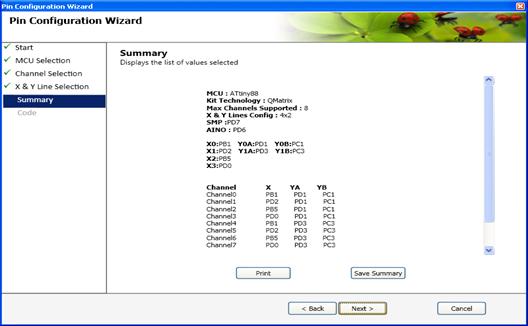
Figure 12. Code Generation tab in Pin Configuration wizard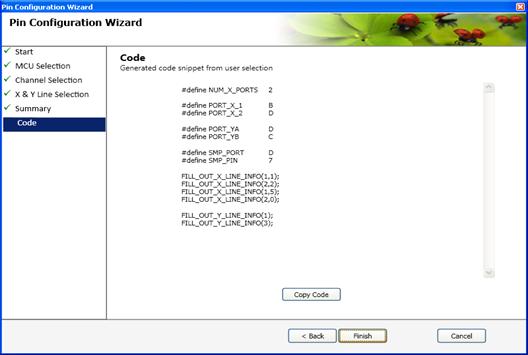
- 9.
The code is shown in the New Window Screen.
Note:Use FILL_OUT_YA_LINE_INFO and FILL_OUT_YB_LINE_INFO code instead of FILL_OUT_Y_LINE_INFO as now YA and YB can be shared on same port.
The code can be copied using the “copy code” and pasted in the main.c and touch_config.h file.
The code is shown in the New Window Screen.
- 9.1.
In touch _config.h, Copy the following header definitions as part of the preprocessor directives in the project space or in the beginning of the file
#define NUM_X_PORTS	2
#define PORT_X_1	B
#define PORT_X_2	D
#define PORT_YA 	D
#define PORT_YB 	C
#define SMP_PORT 	D
#define SMP_PIN 	7
#define SHARED_YAYB 0
- 9.2.
In main.c, copy the code as below.
x_line_info_t x_line_info[NUM_X_LINES] = {
    FILL_OUT_X_LINE_INFO(1,1);
    FILL_OUT_X_LINE_INFO(2,2);
    FILL_OUT_X_LINE_INFO(1,3);
    FILL_OUT_X_LINE_INFO(2,0);
};

y_line_info_t ya_line_info[NUM_Y_LINES] = {
    FILL_OUT_YA_LINE_INFO(1);
    FILL_OUT_YA_LINE_INFO(3);
};

y_line_info_t yb_line_info[NUM_Y_LINES] = {
    FILL_OUT_YB_LINE_INFO(1);
    FILL_OUT_YB_LINE_INFO(3);
};
- 9.1.
If YA,YB shared on same port feature is needed , then apart from the above Macros #define SHARED_YAYB needs to be enabled as 1.