MPLAB X IDE plugin tools, like DMCI, are available from either the Plugin Manager in the IDE or the Embedded Code Source web site.
Viewing Installed Plugins
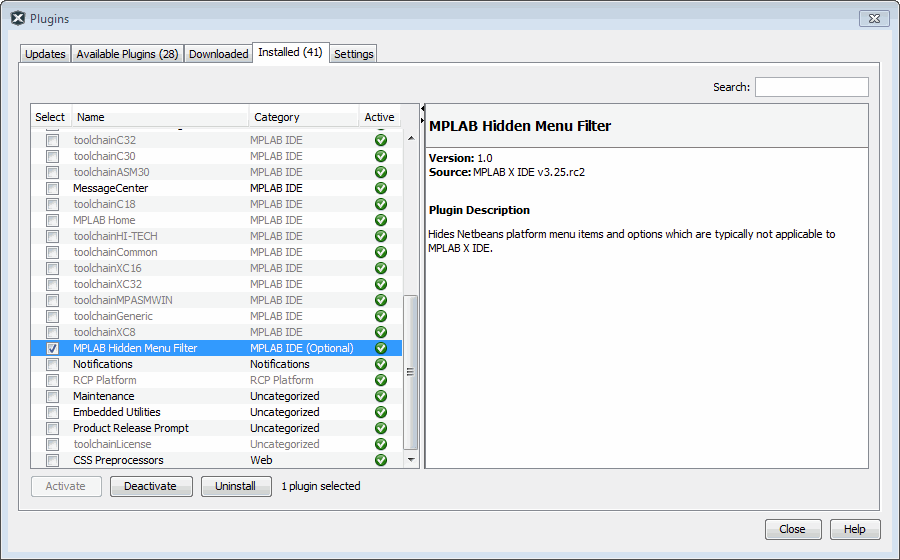
MPLAB X IDE comes with a number of plugins installed. Although ungrayed items may be deactivated or uninstalled, this is not recommended unless the category is listed as optional.
To view installed plugins, select Tools>Plugins and click on the Installed tab.
Add Plugins from the Plugin Manager
To view and install available plugins:
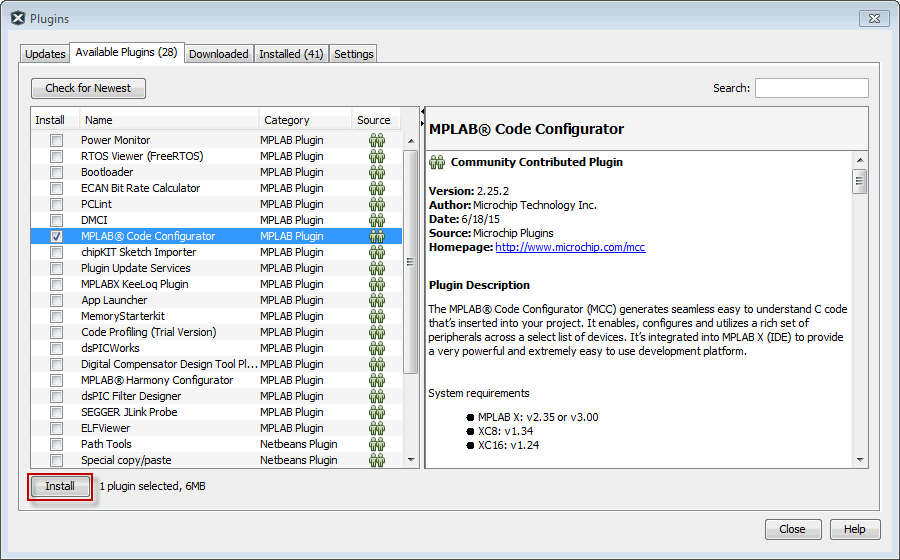
- 1.In MPLAB X IDE, select Tools>Plugins and click on the Available Plugins tab.
- 2.Select your plugin by checking its check box and then click Install (see figure below).
- 3.Follow the on-screen instructions to download and install your
plugin.Note: Some plugins may be dependent on the modules in other plugins for their functionality to be implemented. The Plugins Manager warns you when this is the case.
- 4.Once installed, the plugin will be listed under the Installed tab, where it can be deactivated, reactivated or uninstalled.
- 5.Look for your tool under Tools>Embedded. If you do not see it, you may need to close and re-open MPLAB X IDE.
Click the Help button to read more about installing plugins.
Add Plugins from Embedded Code Source
To view, download and install available plugins:
- 1.Go to the Embedded Code Source web site:
http://www.embeddedcodesource.com/codedeveloper/microchip-technology
- 2.Select a plugin and follow the instructions on the web site to download to a folder on your computer.
- 3.Extract the
.nbmfile from the downloaded ZIP file. - 4.In MPLAB X IDE, select Tools>Plugins and click on the Downloaded tab.
- 5.Click Add Plugins. Find, select, and open the
.nbmfile.Figure 3. Downloaded Microchip Plugin Tools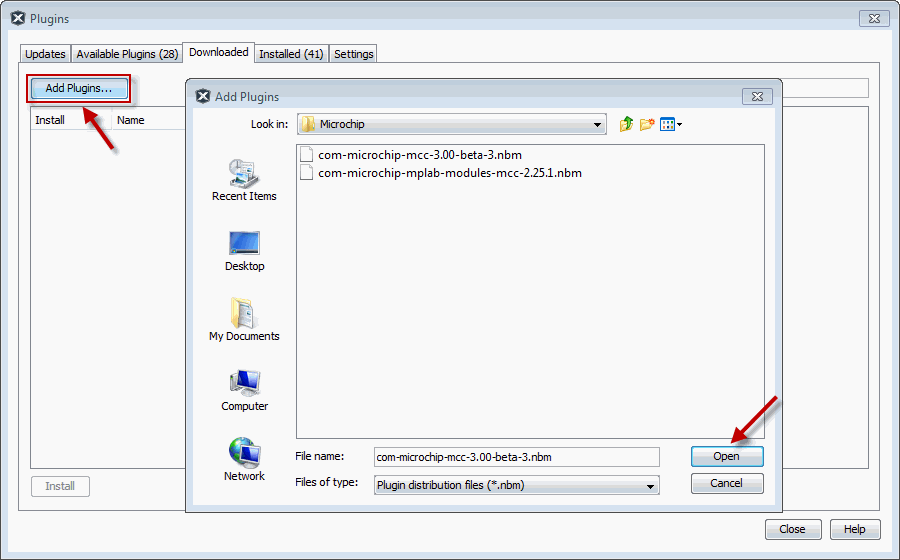
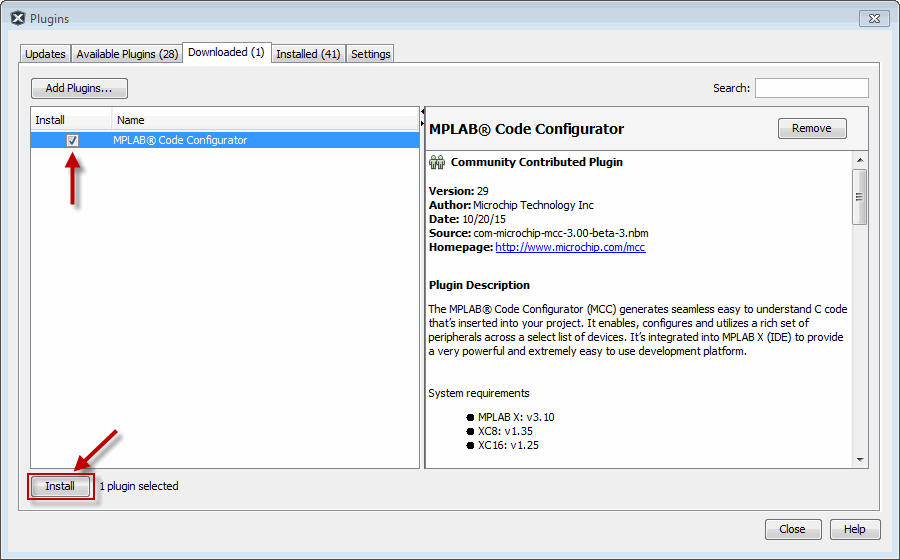
- 6.Click Install to install the plugin. Ensure that the check box next to
the plugin name is checked. Figure 4. Install Downloaded Microchip Plugin Tools
- 7.Follow the on-screen instructions to download and install your
plugin.Note: Some plugins may be dependent on modules in other plugins in order for the functionality to be implemented. The Plugins Manager warns you when this is the case.
- 8.Once installed, the plugin will be listed under the Installed tab, where it can be deactivated, reactivated or uninstalled.
- 9.Look for your tool under Tools>Embedded. If you do not see it, you may need to close and re-open MPLAB X IDE.
Upgrade Plugins
To determine if there is an update for your plugin:
- 1.In MPLAB X IDE, select Tools>Plugins and click on the Updates tab.
- 2.Click Check for Updates.
- 3.If any updates appear, ensure that the check box next to the plugin name is checked and then click Update.
- 4.Follow the on-screen instructions to update your plugin.
Installing a new version of MPLAB X IDE will NOT update your installed plugins. Plugins are tested against a versioned interface of a release. Not all plugins can be migrated between versions so they are not carried over. This is true for NetBeans, also. So, you may need to reinstall your plugins when you install a new version of MPLAB X IDE.
Configure Update Centers
To see available plugins in the Plugins window, you must have one or more update centers configured. MPLAB X IDE comes with two Microchip Update Centers already configured:
- lhttp://ww1.microchip.com/downloads/mplab/X/plugins/updates.xml
- http://ww1.microchip.com/downloads/mplab/X/thirdpartyplugins/updates.xml
To configure another Update Center in the Plugin Manager:
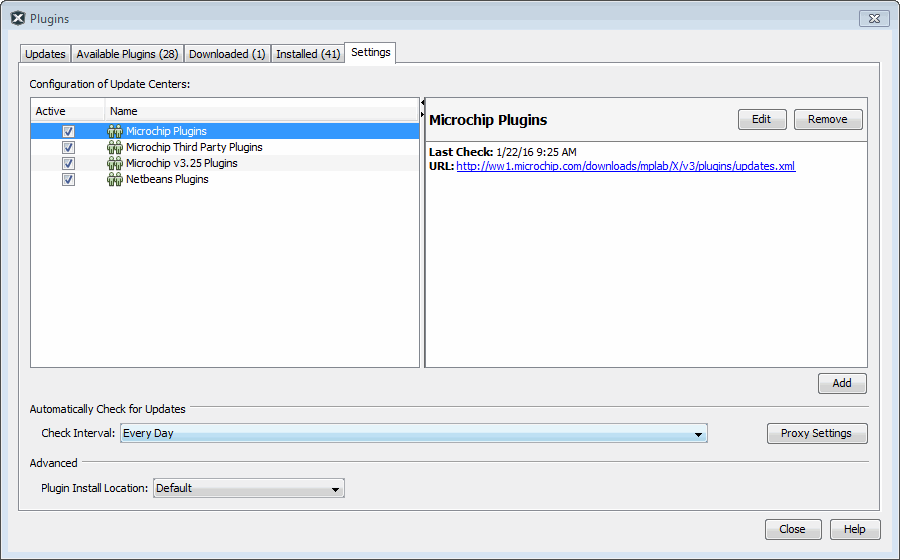
- 1.Select Tools>Plugins and click the Settings tab.
- 2.Click the Add button to open the Update Center Customizer dialog.
- 3.Enter a name for the update center.
- 4.Enter a URL for the update center.
- 5.Click OK.Figure 5. Configure Microchip Update Center
Configure Installed Plugin
Once a plugin is installed in MPLAB X IDE, you may need to configure it. Plugin configuration options are available under Tools>Options, Plugins. See “Tools Options Plugins Window.”
Plugin Code Location
Plugin code is stored with MPLAB X IDE user configuration data. See Viewing User Configuration Data.