- 1.Create a new project by
selecting New Project from the Project
menu. This will open the Project Wizard.
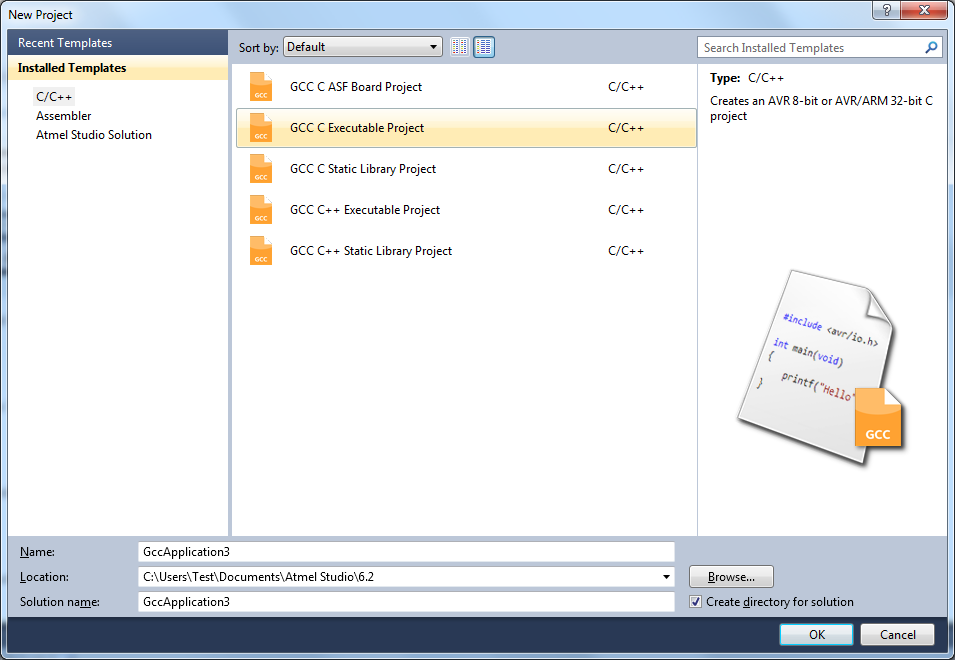
- 2.Select
C/C++→GCC C Executable Project as a
template, then specify a project name, select a location, and write a solution name for
the project. A file with the same name as the project will be created and added to the
project by default. It will contain an empty
main()function. If you want to change the name of the initial file, just edit the main file name afterward. Press OK when you are satisfied with the settings. - 3.Select
C/C++→GCC C Static Library Project as a
template, then specify a project name, select a location, and write a solution name for
the project. This creates a Static Library (LIB) project, which is a good way to reuse
code.Tip:
See section Starting a New GCC Static Library Project to learn more about Static Library projects.
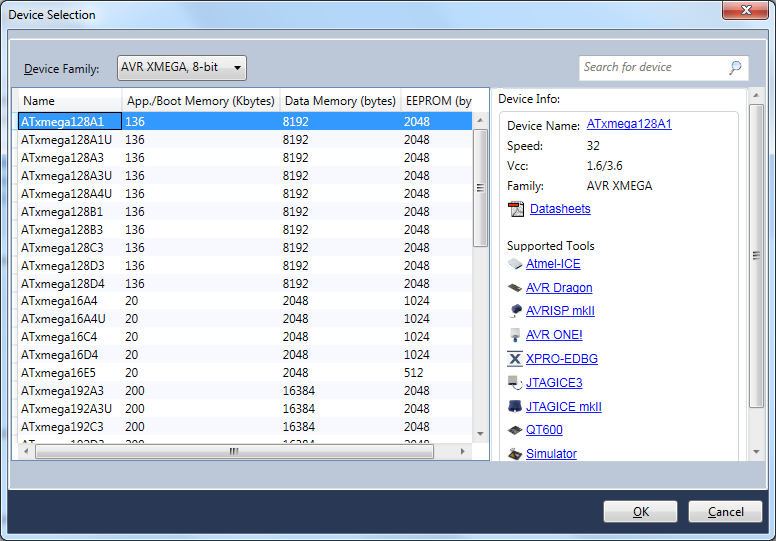
- 4.
A device selection table will
appear. Choose the appropriate target platform for your project. To start you can select
the ATxmega128A1 device. Figure 1. Device Selection
- 5.The project tree will be set up. Notice that the initial file created in step 2 has been added to the project node. Also, the initial file will be opened in the editor.
- 6.In order to facilitate
applications development and verification, you can also use the Driver Selection Wizard,
invoked from Project → ASF Wizard...
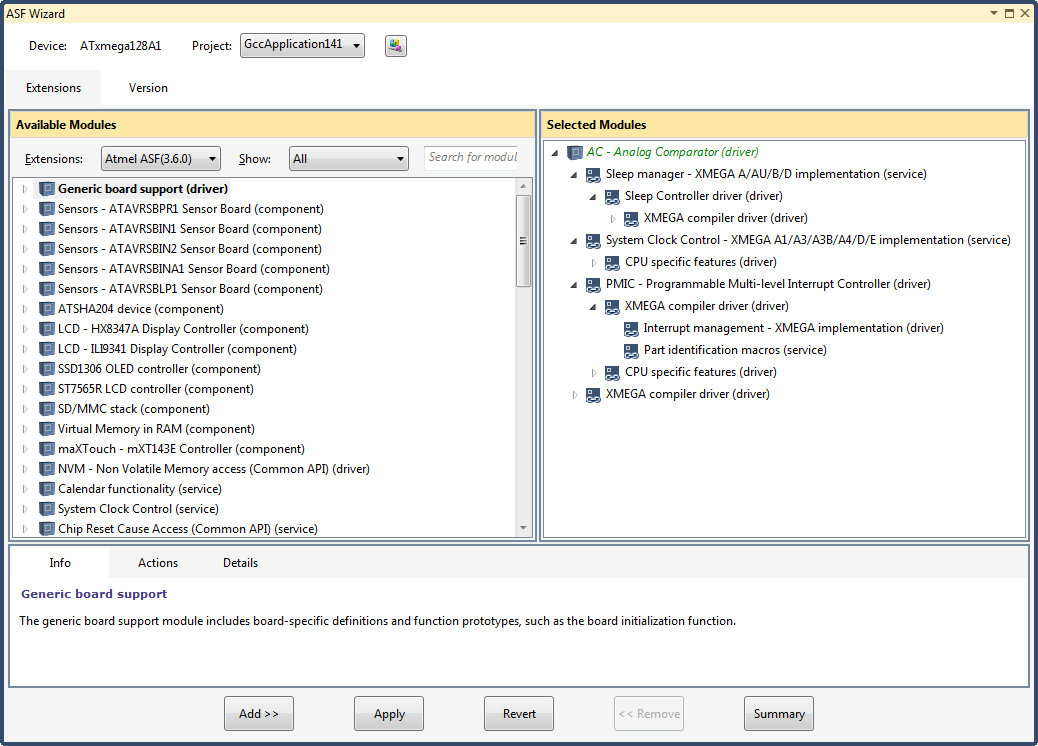
In the ASF Wizard you can select which Drivers, Components, and Services you would like to use in the project for current build architecture and board.
- 7.Now, write the following
code into the open editor
window.
#define MAXINT 200000

int main(void)
{
    unsigned int t=1000, k=0, l=5, pn=2;
    unsigned int primes[t];
    primes[0]=2;
    primes[1]=3;

    while (pn < t || primes[pn] < MAXINT)
    {
        for ( k = 0; k <= pn; k++)
        {
            if (l % primes[k] == 0)
			{
                goto otog;
			}
            else
            {
                if (k == pn)
                    primes[pn++]=l;
            }
        }
otog:
        l += 2;
    }
    return 0;
}
- 8.Build the project.
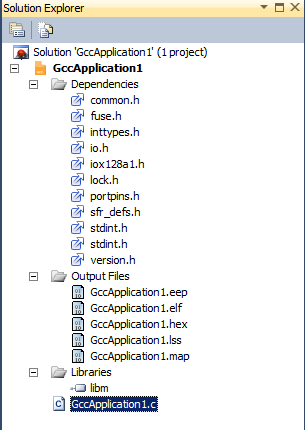
Dependencies
All the included files are listed here. Double-click on any file to open it in the editor.
Output Files
All output files will be displayed below this item.
Libraries
All Static Library files, Toolchain Library, and other Library Files will be displayed below this item.
See section Library Options to know more about Library options.